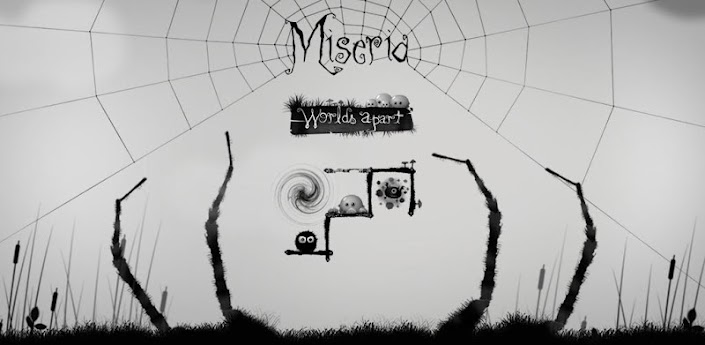
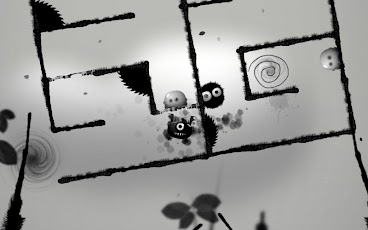
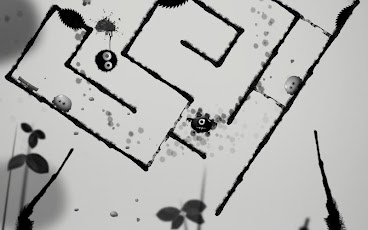
Miseria is a new physic-based puzzle with simple controls,but very challenging.The game is similar to other known physic-based games,with cool looks and style.Each level gets more interesting and complex,having this cute little character getting trapped in the most threatening situations!
Charlie Hop is a new physic-based puzzle game available for FREE on Google Play! In this game you control the laws of physics , and have to guide Charlie to complete the levels.The objective is simple collect all 3 stars to complete the level.
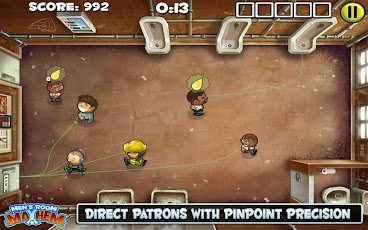
Men's Room Mayhem FOR ANDROID Men's Room Mayhem is the best game to play while sitting on the toilet! In Men`s Room Mayhem you play as a janitor in a nightclub toilet, and must direct the customers to urinals and cubicles. You'll need to act quickly to avoid messy accidents. AND you'll need precision. If two heavily inebriated customers have a run-in, you see, they'll have a fish fight in the middle of the men's room.
Men`s Room Mayhem features:
Direct patrons with pinpoint precision
Lots of unique patrons with differents characteristics
From nightclub to country club,clean up in five challenging locations
Finding Teddy for Android FINDING TEDDY is a new point and click puzzle/adventure game available now for Android! The adventure starts when a monster comes and steals the Teddy Bear from a little girl.The little girl is the main character that you control through a magical world,full of monsters in search of her Teddy. The gameplay is very easy,just click anywhere to interact with the environment,drag and drop to use items from your inventory. In your journey you will meet two characters(Mister Fly and Mister Cat) that will help you solving the riddles.
CAN KNOCKDOWN 3 is a new installment from the critically acclaimed Can Knockdown series. Put your aim to challenge in this new physics-based game combined with unique puzzles and explosive action! Can Knockdown 3 comes also with amazingly realistic graphics and perfectly-tuned physics engine.
CAN KNOCKDOWN 3 FEATURES:
Multiple challenging levels in beautiful 3D locations
Puzzles from Easy to Tricky… can you knock them ALL down?
Show off your skills and challenge your friends!
Multiple achievements and badges… collect them ALL!
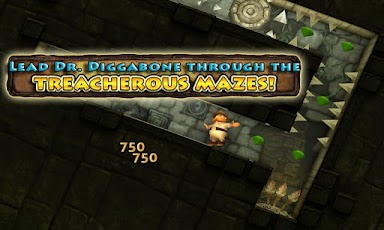
[NEW GAME] Lazy Raiders LAZY RAIDERS is a new game from NAMCO BANDAI GAMES that is available for FREE on Google Play! Lazy Raiders is a gravity-defying quest,where you control the Doctor through 60 mazes by spinning and flipping the world around. You will have to tilt, spin, and flip the world around Dr. Diggabone, a lazy, greedy, and funny archaeologist.
We'll skip the intro and tutorial sections. If you can't figure out how to follow simple instructions, you won't do well in The Room.
First up, you'll be left to figure out the meaning of a riddle. So, "what survives when fed and dies when given water?" Fire, of course! Navigate to the leg of the safe with 'Fire' written on it, double tap to zoom in, and press the symbol to reveal a key. Now, zoom out and double-tap on the odd part of the riveted strip, with the scratched panel to the left. Slide the riveted section to the left to uncover a keyhole. Now, select the key and rotate the end until it matches this shape. Drag onto the keyhole and rotate the key to reveal a wrench. Take the wrench and skim around the safe until you see the Talisman sign. Zoom in and drag the wrench onto the bolt holding it in place. Rotate to reveal a lens. Take the lens and rotate to the side of the safe with the large circular pattern in the middle. Looks like it's going to open, doesn't it? Slide that panel above to the left to reveal another keyhole. Rotate the key-end to fit again and unlock as before. The doors will slide open to show a series of gold rings. Zoom into these and tap the viewing instrument (now with a snazzy new lens) to spot the invisible ink pattern. There'll be a lot of this kind of thing throughout the game. Rotate the circles until they line up. Use the ankh symbols to get your alignment right - it should look something like this. Now, open the safe door to reveal... another box! Chapter complete. Chapter 2 Rotate to the right until you reach the slightly shimmery side with the four-part combination lock. Zoom in and use the eyepiece, and you'll see a cube lurking inside surrounded by number fragments.
Rotate up, down, left, and right until you align the pieces to reveal the numbers for the combination lock. There's one on each side, so note down all four and their position on the cube. Remove the eyepiece and input the code (it's 5, 2, 7, 6 starting from the left and moving clockwise) to reveal a switch. Pull the switch down. This new box has a strange lighter mechanism on its right-hand side, but there's no fuel. See that golden ridged leg supporting the main box? It's slightly larger and brighter than the rest. Double-tap on it and rotate it to reveal a paraffin-soaked cotton strip. Now, double-tap the right-hand side of the lighter box and drag the paraffin strip onto the empty slot. Flick the lighter wheel to set the paraffin alight and reveal a new switch. Pull the switch up. Zoom out and rotate to the opposite side of the main box. You'll note that the opposite leg has its own ridged golden section, but higher up. Zoom in and rotate it to reveal a telescope. Well, it doesn't look like a telescope yet, but a quick touch of the front section will make it come out of its shell. Go back to the light box, zoom in on those arms, and drag the telescope into place. Now, we need to get this thing wound up and working. Zoom out and pop on the eyepiece. Scan around the box until you spot some fingerprints on one of the legs, which should be glowing bright green. Double-tap to zoom in on them, then touch to reveal a book. Pick up the book and tap it to take a closer look. You want to make space for the right-hand latch piece to rotate 180 degrees, so rotate the top and bottom circles 180 degrees, then the central segment 90 degrees. You should now be able to move the right-hand segment and open the book to reveal a winding key. Now, go back to the light box and zoom in on the left-hand side where the little door is. Flip the latch open to reveal the machine's innards. Drag the winding key onto the slot and rotate to get the machine started. Double-tap on the telescope to see a rather creepy, scratchy old moving picture with a schematic of the eyepiece in the background. Hmm, a clue? You bet it is. Slip on the eyepiece and look again. Spookily, the picture has changed, and the word 'TRIAL' is spelt out in bold lettering. A code of some kind? We'll come back to that in a bit. Leave the picture and the little circular metal plate to the left will open to reveal another series of circles. You can match them up pretty easily according to the pattern, but you'll need to pop on that eyepiece and line up the more ornate goat skull pattern to crack this one and reveal a metal piece with the letter 'L' on it. Now, rotate to the side of the box with the five-letter combination lock. Slide the letter 'L' into place in the final slot, then adjust the rest to spell the word 'TRIAL' from earlier. That's the first seal of three cracked! And now there's a new contraption to crack. First up: rotate to the top of the new machine and read the note. This symbol will be appearing repeatedly from now on. Now to crack a puzzle that will no doubt have been bugging you for this entire chapter - that four-symbol key code. You may have spotted some of the clues for this dotted around the box, but here they all are:
Symbol 1: Near the top of main box, on the spire. Symbol 2: In the first eyepiece cube puzzle, on the left inner wall. Symbol 3: On the inside of the slot where you found the book. Symbol 4: Just above and to the left of the symbol pad itself, on the leg. Now, type these symbols into the combination lock below to get a cross-shaped key. Now, rotate to the top of the new pop-out box and push the slider to the side to reveal a strange-looking game board. Tilt your iPad until all four baubles are locked in place with their coloured side facing up. A drawer will open to the right-hand side. Zoom in and put on your eyepiece. Now, line up the fragmented image so that it forms a picture of the hex symbol we saw in the note. A new keyhole will appear. Put in the cross-shaped key and rotate to free the latches on the small drawer to the right. Slide the drawer open and take the key inside. Now, rotate to the front of the box and insert the key into the tiny lock. Rotate to open the safe. Take the star emblem, and note how the keyhole changes shape. Yep, we'll be back. Move up to the top of the box and locate the star emblem, right on the spire. Insert the star-key to strip away some more of the box's layers. After reading the note, rotate around until you see the brass ring propped up against the box. Pick it up, then scroll down and zoom in to the left-hand surface of the pop-out box. Place the brass ring on the safe dial. Turn the dial as follows, with the locks removed from the equation once they engage (you'll see what we mean): one to the left (until the first latch clicks), two to the right, another one to the left, one to the right, one to the left.
A cylindrical mechanism will slide out - push the two sliding switches up together to reveal another of those rotatable keys. Go back to the front of the pop-out box and that transformed keyhole on the front. Look at the key and match the shape - note that there are two components this time around, which makes things slightly trickier. Unlock the safe to find a circular object. Take it! Zoom out and rotate to the side of the box with the cog emblem above a circular keyhole. Insert the round object you just obtained to break the second of the three seals. One more to go! Guess what? A new box has popped out, and it's the most complex yet. First, zoom into the left-hand side with all the cogs. Flip the slider switch left so that the golden cog shifts position. Then, crank the handle to reveal a new puzzle. Now, you need to find the four dials corresponding to the newly revealed puzzle - they're directly linked, so shifting them will shift the puzzle pieces. The idea is to rotate them so that the missing quarters align with the rectangle beneath.
Circle dial: Immediately below and to the right - rotate so that the shaded sector is pointing south-east. Square dial: In front of the statue above and to the left of the puzzle - rotate so that the shaded sector is pointing north-east. Pentagon dial: On the cog box, to the bottom right of the side with the crank handle - rotate so that the shaded sector is pointing north-west. Triangle dial: Right-hand side of cog box, slide the panel with the triangle symbol up - rotate so that the shaded sector is pointing south-west. Now, pull the unblocked drawer out where the circle puzzle is. Take the cog and the elastic band. Go back to the left-hand side of the cog box and put the new cog on the top-left-hand slot. Now, crank the handle again to get the first of the three mechanisms spinning, and to open a little hatch to the left. Collect the red screwdriver from here. Flip over to the other side of the cog box - where the triangular dial was - and drag the screwdriver onto the four screws holding the metal plate on, rotating for each. Now, you need to use the two buttons to stop the spinning cogs at the right point so that you can gain access to the item within - which is a peculiar folding key. Move above and to the right of the cog box and zoom in on the strange multi-key shape. Look closer at your new key and move the components around so that they match the shape behind. Then, drag the key into the slot to open a drawer containing two more cogs. Now, go back to the left-hand side of the cog box and slot the two new cogs into place between the two standalone cogs in the middle.
Move the slider switch to the right again to link up the handle and rotate to get the second mechanism turning, as well as to reveal a new cog on the front of the box. Grab the new cog, as well as the two other cogs you placed on the box. Arrange them to the right of the box, with the two larger cogs at the top, then drag the elastic band onto them to join up the mechanism. Crank that handle. That's the cog mechanism complete. Now, flip to the front of the cog box and press the button to reveal a steel pipe. Look at the pipe and swipe the top to reveal a key and a photograph with 'REV. 6:05' written on the back. Use the small key in the wooden panel on the right-hand side of the cog box to reveal a new hex-shaped puzzle. Use the eyepiece to view the fragments of the hex shape. This time, you'll need to move the cube and rotate the cylinder, as well as find the right camera angle. A silver shield will be revealed. Take it and place it on the golden statue at the top of the main box. He will turn, revealing a gem. Take it. Place the gem into the slot on the clock face, on the front of the cog box. Now, put the eyepiece on and you'll see a set of clock hands. Rotate the dial until the time reads '6:05' (remember the photo?). Chapter complete!