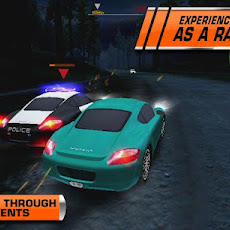
How to improve graphics in Asphalt 7 v1.0.6 and other versions
Old tutorial on how to enable max graphics on Asphalt 7 is not working anymore with the new version of Asphalt 7.The steps are the same,what is changed is the deviceconfig.xml file.

How to enable max graphics on Asphalt 7 v1.0.6:
First DOWNLOAD the new deviceconfig.xml for Asphalt v1.0.6 and unrar the file: HERE
EXAMPLE :
If the line is
<bool name="use_hires_map" value="false" />
change it to
<bool name="use_hires_map" value="true" />
Hope this will help you!
Old tutorial on how to enable max graphics on Asphalt 7 is not working anymore with the new version of Asphalt 7.The steps are the same,what is changed is the deviceconfig.xml file.
How to enable max graphics on Asphalt 7 v1.0.6:
First DOWNLOAD the new deviceconfig.xml for Asphalt v1.0.6 and unrar the file: HERE
- Go to ur phone find the data location (sdcard/ android/ obb/ main.100.com.gameloft.android.ANMP.GloftA7HM)
- Change the .obb file to .zip, then open the .zip file.
- Go to data/ deviceconfig folder
- Replace the file with the one you download
- Change back the .zip to .obb
Now for those who have older version of Asphalt 7(1.0.5....) this is what you can do to improve the graphics:
First you have to locate the deviceconfig.xml file in the main obb or the patch obb.After this open the file deviceconfig.xml with Notepad and where you find the obove lines ,change all of them to this:
<int name="menu_car_lod" value="3" />
<int name="gameplay_car_lod" value="3" />
<bool name="use_car_shadow" value="true" />
<bool name="use_radial_blur_on_nitro" value="false" />
<bool name="use_hires_map" value="true" />
<bool name="use_traffic_shadow" value="true" />
<bool name="use_lodev_textures" value="MEDIUM" />
<string name="showTrackLowLODDistance" value="MEDIUM" />
<bool name="use_high_quality_car_shader" value="true" />
<bool name="draw_car_reflection_garage" value="false" />
<bool name="lottery_low_profile" value = "true"/>
<bool name="use_dynamic_reflection_on_cars" value="true" />
<float name="car_particle_multiplier" value="0.5" />
<float name="use_particle_rate_pct" value="50.0" />
<bool name="use_hud_low_res_texture" value="true" />
<bool name="use_menu_high_res_texture" value="false" />
EXAMPLE :
If the line is
<bool name="use_hires_map" value="false" />
change it to
<bool name="use_hires_map" value="true" />
Hope this will help you!